Tuesday, January 31, 2012

Your Creative January

So, have you had a creative January?
It doesn't need to be a lot every day, because just like a journey - it starts with a small step!
My creative colleague Lynette has a great piece about Finding Time. So read it here. What Lynette says about using time creatively is so true - it's like having your sewing machine threaded up. You can sew lots in 5 minutes (this is another of Lynette's gems, which I now abide by).
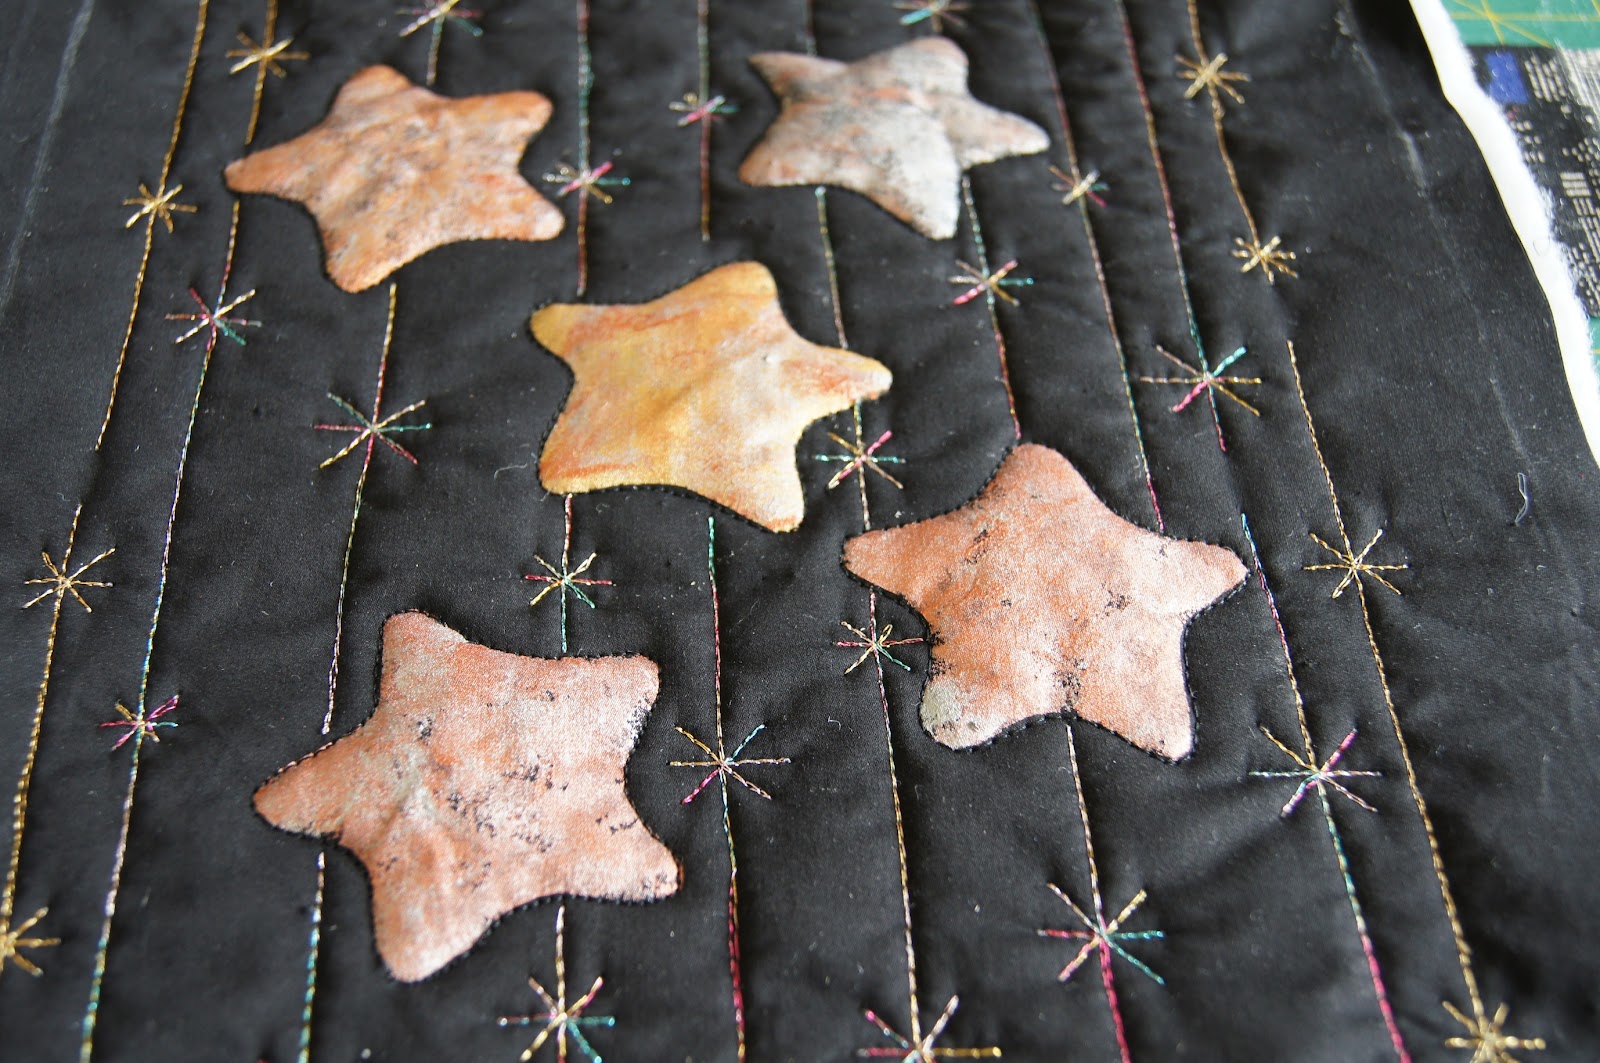
Here is my first piece to add to my S.I.X. challenge. The headlines are Mod Podged just like the postage stamps, onto the fabric.
I collected the words from headlines out of a week's worth of newspapers. I'm not sure yet how I will quilt it - either simply or symbolically - will probably add some paint too!

February - still the shortest month even though we have an extra day - starts tomorrow.
What have you got planned to be creative?

Final S.I.X. Challenge to Start

This is my block which I gave to the others - we all got the exact same.
Mine is a protest - about the situation in Palestine and about how the media manipulates the information (the media being politically driven).
So here it is:
The map is printed onto fabric, I pieced the flag and used puff paint to make the wall.

Fifth S.I.X Challenge Completed

Finally put the finishing touches to Barb's challenge block.
I still don't like the diamond block - I should have left out the quilting lines - but it's all about play and learning :)
I have written a poem around the pieces (well actually it's not my poem, but I have hand-written it - if you get what I mean). It is Quilt Teacher's Ten Commandments by Cindy Thury Smith, you will find it here, along with some other quilt related poems. Barb is a school teacher and also takes quilting classes with her own designs, so I figured it was appropriate to include it.
Yay! one more challenge to complete!

Saturday, January 28, 2012

A Fantastic Plant Score!

Today Derrick and I went to the annual Pohangina/Ashhurst Lions Small holders Auction. There were fewer sheep than last year and I don't think the prices were as good as you can get at the regular weekly livestock auctions. Also, there were not as many chickens as usual, certainly not the diverse range.
But in the chattels, there were a few things we were interested in.
Derrick learnt about Massey-Ferguson tractors and a sheep-handling implement.
And I managed to score 3 great sized yukka plants:
for $1.00!
WooHoo! I reckon the big one would cost AT LEAST $60.00 at a nursery!
I'll buy some nice pots and they will look great at work!

The Fourth Bright Block

This one I have kept really simple! Used metallic threads for some of the stitching and it's simple-ness helps to balance the postage stamp blocks.

I need to sort some suitable fabric for the sashing, then I have an idea, just to make it all look a bit more finished than I think it is now - BUT, I have to work on a sample :( first! Hopefully that will be finished tomorrow.

Thursday, January 26, 2012

How Not To Do It!

OK, so I made the decision not to stitch around the diamond shaped postage stamp fabric. I started stitching a couple of rows around the outside with glitter thread, then stitched across the shapes and 'quilted' it by linking points etc.
Nope - didn't like it :(
The problem is that the 'stamp fabric' shows up the holes if you unpick - a bit like sewing leather.
Ah well! It's not great, I don't like, but I'll just suck it up and perhaps when all the blocks are completed it won't look so bad (but I doubt it!).
Here it is - warts and all:
The third block has triangles of different shapes - you know those mathematical ones like isosceles and equilateral. But we are not going to to have a trigonometry lesson here and I have ignored Pythagorus' theory and hypotenuse didn't even come into it when I was cutting them out! (If you do want a lesson, here is a quick reference).
This time I appli-quilted the pieces with a small blanket stitch using a Madeira gold/black thread so the edges would stand out more. I have considered using the same blanket stitch in wavy lines as a quilting line, but it probably doesn't need it, and to be honest - I find that quite boring!

Hope your day was creative in some way!

Wednesday, January 25, 2012

Number Four Is Completed

I finished the edging late last night - it's just overlocked around the outside and it probably needs something else to finish it really nicely, but I have a blank as to what to do - and no, I don't want to do traditional binding!
Anyway the wool as the sashing has been handstitched down - it's so bumpy, this was the best option.
Here we have the leaves (Cheryl's) of the S.I.X. challenge:
Now back to Barb's work!

Using the Postage Stamp Fabric

As promised in the previous post, here is one of the blocks using the postage stamp 'fabric':
I'm not going to stitch around the pieces - that will get done as part of the quilting - these pieces have been lightly glued in place with Gem Bond (it is my glue of choice when stitching as it is very flexible, dries clear and if you don't like what you have glued down, you have a little time before it sets).
Got to go and buy some batting now! That is one thing which gets whittled down out of the stash - even using all my smaller pieces :(

Have a creative day!

Tuesday, January 24, 2012

Barb's Block for the S.I.X. Challenge

I have just about finished the edging for S.I.X. challenge number four - Cheryl's block - just having to do a bit of hand stitching.
This is Barb's block, which I picked up a couple of weeks ago. I was quite down (lack of creativity and commitment) and I think it was the white background.
Now, Barb loves the brights, so I thought that I would honour that, even if I have to really hunt for something suitable in my stash. That being the case, changing the background colour was probably not an option.

I thought about cutting it up.

But one day, I spied the wonderful collection of bright colours in a box lid of used (cleaned) stamps.

An aha! moment!

I have 'made' some fabric for 2 blocks, which leaves only a small search for suitable fabric for one block!
One a white background I stuck, using matte Mod Podge a whole range of New Zealand stamps - old ones and new ones, some collections are together, but mostly I arranged them by size - not colour. If you brush the Mod Podge over the stamps, the paper is quite flexible and can be easily stitched without tearing.
Check back here tomorrow to see one of the blocks I have made with my stamp fabric.

Sunday, January 22, 2012

Sun Print Block Completed

The leaf sun print block, which I showed you here how to make it - has been stitched and quilted. I have only stitched the veins on the leaves, then stippled around the outside with a variegated rayon, so that the leaves would have a raised look.
I think I like this block!
Hope you are having a creative day!

Free Motion Quilting - Reversed

I bet that got you thinking! I have stitched this block from the back using crochet cottons in the bobbin. I had already pinned my three layers together, but then had a thought (I know - it can be a dangerous thing - thoughts!) that perhaps if I FMQ a leaf design with a fancy thread I could fill-in the leaves with paint - see what my talented colleague Liz has done here - I rather like it! When I looked through my fancy threads, there wasn't anything suitable in greens or autumn colours, but I liked the sheen and mix of colours on the two chosen crochet cottons.
You have to carefully wind the thicker threads on to the bobbin - I managed this on the machine, but at a slower pedal speed. Also it pays to wind on several bobbins - I used 2 in this 11 inch square! I would recommend stitching a sample first to check the tension. The bobbin holder needs to have the screw loosened (with this thickness, it was one complete turn, and don't forget to tighten it when you have finished using the thread!) to allow the threads to move through the tensioner freely.
Here is my stitched piece:
And now to 'paint' the leaves. I used my Derwent Inktense pencils with water to get a colour wash effect.
Follow through the next photos to see the variation in effects that can be achieved.
Pencil on dry fabric
A little water brushed over the pencil marks
Pencil on the damp fabric - can be further 'washed'
If you don't want a water-colour effect it pays to use Textile Medium. The colours are quite intense, just as if you are using paint. It is important to have the Textile Medium only painted on smaller areas that you are working on. You need to have it wet, not dry.
Now to let it dry :)

Friday, January 20, 2012

Cheryl's Block

Cheryl stitched this block - she didn't quilt it which has given me more options (like cutting it up if I wish), instead I stamped over it with real leaves - I forgot to take an unadulterated photo first though:
I am going to have fun with leaf blocks with different backgrounds - may have to colour this background, but I'll make up the others first before deciding.
Have a creative day!

Halfway Through the S.I.X Challenges

Yay! Here is number 3 finished - this one I have bound the outside edges instead of overlocking.
So, halfway finished!

Thursday, January 19, 2012

Baby Birds - Update

They have flown the nest! Two weeks old and they're out of there :(

Tuesday, January 17, 2012

Another Primitive Art Block

This time I have used a napkin! Yes, it is part of a batik tablecloth set I bought in Singapore over 20 years ago. The background has faded a bit, but I have actually used the reverse side, so that the background wasn't so prominent in the overall quiltlet. I guess that some would say it is a cheater cloth, but I'm not worrying, as I have done heaps of work on some of the other blocks.
So here it is, Indonesian batik art. Simply quilted - I used smoky monofilament to stitch around the figure, then black rayon around the outside:
I need to find something suitable to use as the sashing between all these blocks - I'm sure I have something in my vast stash!

Sunday, January 15, 2012

Lots of Stitches and a Little Paint

Another block finished for #3 S.I.X. challenge. Continuing with the theme (broadly speaking) of primitive art, I have drawn and stitched an Incan Sun God. Just free motion quilted straight lines with a pale yellow rayon thread to represent sunlight:
"Coloured" in the sun with Tsukineko all-purpose inks, so that this is the final look:
Hope you have had a creative weekend!

Friday, January 13, 2012

Baby Birds

I have been stalking a little family for the past 10 days or so. As I was searching for hen's eggs one day, I discovered a nest with eggs in it, in one of my hazelnut trees. I'm pretty sure that it is a starling nest, so got out the camera for some photos. After I took the first snap, it was like the light had gone on and woken them up! Here they are, anticipating food:
The nest is very securely made in the fork of the branches, and withstood the gale at the weekend.

Thursday, January 12, 2012

Interesting Sunset Colours

If I was into doing art journals, I would have had my paintbox out to do this:
The sun had almost completely set on the horizon and was behind some low clouds. Kapiti Island, the sea (the tide was way out) and the sky appeared in this blue/grey colour - I think it looks amazing - just like a watercolour painting!

Sun Print Tutorial For Another S.I.X. Challenge

I believe in the adage make hay while the sun shines - so yesterday on the Kapiti coast, the sun was shining beautifully and the wind just a gentle breeze. Out with the fabric, pebeo Setacolor transparent paints, paintbrush and my trusty box of dried pressed leaves.
I used the following colours on damp fabric (which was a heavy cream colour, kind of splotchy): plum, vermilion, lemon yellow and pernod yellow (an olive green), and thinned the paint a little more on the fabric with water so some of the colours mingled.
Lay out the pressed leaves (as the fabric dried I needed to place little weights - stones - on the leaves to keep them in place):
It took 1 - 2 hours for the fabric to dry, with this result:
I also used a skeleton leaf just to see if it was worthwhile doing. Here is the result of that experiment:
I'm pretty pleased with this.
Iron with a dry iron on cotton setting to ensure that the colours are set, then off to stitch!

Tuesday, January 10, 2012

Creativity and Commitment

I'm struggling with these two words today - perhaps it's because I'm physically tired after 2 days at work and physical exercise (yes, I'm not used to the P.E.!). Sunday evening we had quite a gale in the region and we lost large branches off several trees plus 2 of the poplars were rent almost in half (thank goodness they will grow again). That was 3 hours of assisting the man-about-the-house after work yesterday, and today I decided to rent the carpet cleaner to clean the carpet at work - well, the kiddies play area and around the Issues Desk at least - phew! I had quite a sweat worked up doing that! Just want to sleep now :)
I picked up Barb's block for the S.I.X. challenge this evening, and nothing comes to mind immediately on what to do with it.
I know that perfection is not the answer in making these challenges - I'm trying to do something different, if not entirely new, with my blocks. We should have them finished by the end of this month, although I know that some have not started theirs! Oh, my! am I doing too much on mine?
Commitment is waning, as I so want to get them finished and work on something else - I have several quilts waiting to be quilted and need to work on another military banner.
At least I can show you the finished Cave Art block of the third challenge. I decided to do a medium stipple around the outside. I very rarely do stipple as it is so boring to sew, but in this case, there wasn't a lot to do and the hand-stitching catches down most areas. It is still 'puffy' in the middle, but then the cave walls were not necessarily flat and smooth either!
I hope you are not suffering from lack of creativity or commitment - I think the focus on achieving even a small amount is very important.
Enjoy!

On To Number Three

I have little dilemma here, because I have started a block on 2 of the challenges, but I think I will go with working on Sue's challenge. This is the block she gave me - she has made the fabric with paper and paint:
It is Egyptian art. Derrick and I visited Egypt (very briefly, as it was June and therefore low tourist season because of the heat!) in 2009, so Sue figured I would really appreciate this piece of work - and I love it! I have decided to go with a primitive art theme. Initially I was going to do cave paintings, but have decided to do each block from a different culture.
This is my first one which I drew onto fabric with the artists pastels. I wasn't sure how well it would work, but they aren't greasy and it seems to stick OK to the fabric, and after all it isn't going to get washed.
Just a bit of hand stitching for the quilting (this has taken a few hours though) - I didn't want to do interfere with the 'art' too much and I will probably fill in around the outside with machine quilting.

Sunday, January 8, 2012

Number Two Is Finished

Once at my sewing machine, it was head down and get quilting! When the block was finished I started the old habit of procrastinating - playing with something else, you know, anything to put off finishing something - why IS that?
Stern words were said to myself (no flaying of the back with a whip though) and I set to to square off all 4 blocks to the same size, triple zig-zagged them together, then cut the sashing for both front and back - these have been put together just like a quilt-as-you-go.
Number 2 of the S.I.X. challenges finished - even overlocked around the outside edges:
Here is a close-up of the last block - I tried really hard not to think too much about it, but have to admit to changing the colours to suit the other blocks more. It is supposed to be organic, so you can read whatever you wish into it (if you must). It doesn't really have any meaning to me, because I just wanted to put something down randomly on the white, then have fun with some hand-stitching.
I used some of the threads from the Oliver Twists range by Jean Oliver (U.K.). I really love Jean's selections, but the hanks have to be carefully unwound, then each of the threads re-wound onto spools, otherwise you end up with huge big tangles, tears of frustration and wishing you could just cut out the knots.

A Little Beach Holiday

I've had a couple of lovely days at Waikanae Beach, so no sewing machine, but I did take a bag of Vliesofixed pieces, my white background, small scissors, thread and a needle.
Here is what I have done so far for the second S.I.X. challenge on the white background:
Now that I'm home (work starts tomorrow) I will be able to do some machine stitching lines, quilting and more hand stitching. Then to joining all 4 blocks together!
Here are some lovely evening beach photos:
Sunset on Waikanae Beach, Kapiti Island in the background


Having fun with our long shadows

I also got to have a swim in the sea - first time for years - then Rebecca and I dug for pipis and cockles which we steamed and ate before tea - mmm! crunchy sand! Fun though! 

Thursday, January 5, 2012

Simply Stitched!

Here is my second block - the one with the black background:
I cut a stencil of the stars onto freezer paper and ironed it to the fabric, then using a munted foam brush, 'painted' the stars with acrylic metallic paint (I LOVE that paint - it comes in gold, silver, bronze and copper colours). The quilting is one of Leah Day's designs - Icicle lights - done in metallic thread, plus I stitched around each star with black thread just to make them 'pop' a little.

Now for the white background block - I'm not going to be afraid of filling the white, I'm just going to place shapes and colour (without thinking too deeply about it) onto the 'page'. I want an organic look to finish this quilt.

Wednesday, January 4, 2012

Second S.I.X. Challenge

I know that some days it's going to be hard doing something creatively - the lawns will call, a day at the beach, the latest novel I've almost finished - but I am trying to be in the zone!
The 2nd of the S.I.X. challenges that I'm working on is Dianne's block. Here she has done an easy reverse applique which she was teaching in a class:
I've decided to stick with the black/white backgrounds. My first block has been simply worked. I cut up a quilt I made for a Rose City Quilters challenge.  I was pretty depressed at the time and have never really liked it. So I have unpicked and reused some fabric, and have cut up the background to reuse here:
I then cut out a koru and used some copper Glimmermist to spray the design on top. Hand worked the chain stitch around the outside of the shape to give more definition.
The other 2 blocks will have a plain black and plain white background.
More to come!

Tuesday, January 3, 2012

Being Creative - Differently!

Hello all you creative people! Yesterday I spent with my lovely girls in Wellington. We went to Te Papa (New Zealand's national museum) to view the wedding dress exhibition Unveiled: 200 years of wedding dress from the Victoria and Albert Museum, London.
Silk satin wedding dress by Charles James, London, 1934. Wax orange blossom choker. Given by Mrs. Alec Hambro © Victoria and Albert Museum/V&A Images
This exhibition is great value for money at $15.00. I think there were at least 30 dresses on display, great commentaries and a time to sit and watch some movie clips of royal and social weddings. There were heaps of people, both at the exhibition, and at Te Papa - I guess that as it was a national holiday, there weren't too many other places to go to and a lot of shops and eating places were closed!
We then went out to The Dowse in Lower Hutt for the Bedazzled exhibition: Royal NZ Ballet Costumes Designed by Kristian Fredrikson:
Kristian Fredrikson, Cinderella Ball Gown, 1991. Princess Odile from Swan Lake, 1985. Fairy Spring from Cinderella, 1991
This was a free exhibition - not so many costumes, but nevertheless, you could get up really close to have a look at the work (no touching though!) - and hardly any people!

Even though I haven't done any sewing (as yet, and the day isn't over!), I did use my camera, creatively!
I love this shot of the rocks at Worser Bay - looks like it could be reproduced using tyvek!
How about this single leaf? Great lines - could be reproduced in (almost) 3-D  :
And the colour inside this lily - I think the fairies have been at work:
Now - what about some sewing!